In the digital world we’re living in, how your website looks is everything, especially for tourism operators trying to grab the attention of potential visitors. But here’s the thing, it’s not just about picking stunning images; you need to make sure they’re working for your site, not against it.
A lot of you miss the mark with their images, and it’s a bigger deal than you might think. Having images that are too big can drag down your site’s loading speed and decrease your rankings on Google. And if your images aren’t the right size or look pixelated it’s not a good look for your professionalism.
So, we’re here to break down how to get your WordPress images to level up your site, not weigh it down. We’re talking about resizing, picking the right formats, and naming your images so they make sense. It’s all about making sure your images are ready to shine online, from understanding the difference between dimensions and resolution to choosing the smartest file format. Whether you’re decking out your site with a killer banner or just sprucing up your content with some pics, knowing the right size and format is key to keeping your site looking sharp and loading fast.
Let’s dive into these game-changing tips and tricks, helping you nail your website’s image game and stand out in the busy tourism market. Trust us, it’s easier than you think, and it’ll make a world of difference.
Image issues on tourism websites
- Images are way too big: this affects load time and search engine rankings
- Images aren’t the right dimensions
- Images are pixelated
How to improve your WordPress images
Resizing images before uploading
When we talk about resizing images, we mean optimising the dimensions and resolution of your images prior to uploading them to your site. Whilst image optimisation plugins are available, they are not always installed on your website (e.g. your server many not support it, you might not have a license) so nothing beats forward thinking.
Dimension vs resolution
- Dimensions are pixels (width and height): Tools that work well are: preview (Mac), paint (windows). More here
- Resolution is level of detail in the image. Tools that work well are: tinypng.com.
Image format simplified
- JPG: for images without transparent background
- PNG: when you need transparent background
- WebP: newer file format for images on the web. Offers up to 34% smaller file size than JPG and PNG. Supports transparency. More here.
Naming your images
- Name your images something meaningful before uploading them e.g. 3-bedroom studio.jpg vs DCIM43424.jpg
- Get in the habit of adding alt text and caption once you have uploaded your image (directly in the media library)
Process
- If required, download the unoptimised images from your website, resize them
- Reupload them using the enable media replace WordPress plugin
Critical Knowledge
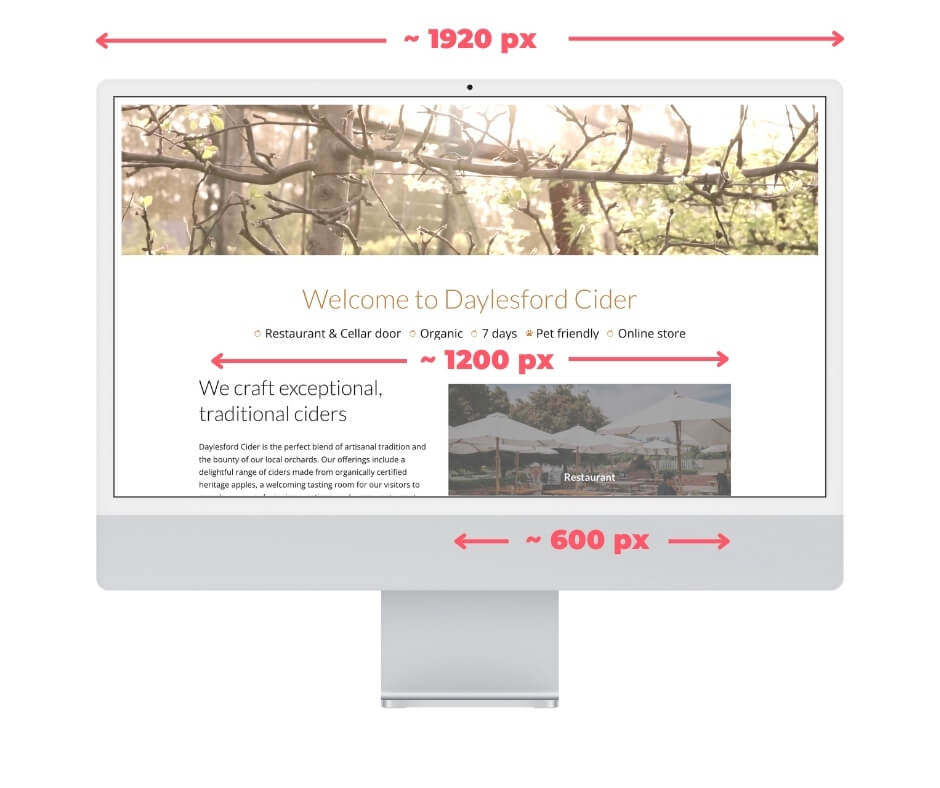
 Once you understand that the width of a computer monitor is about ~ 1920 px wide and the size of your website container is about ~1200 px, it is easy to visualise the dimension of the images you will need.
You should never upload an image which has bigger dimensions than you will ever need.
What is the right size?
Before you upload your images to WordPress you need to know where you will use them in order to choose the right size.
- If you intend to use them as a full-width banner (hero) you’ll best resize them at 1920x1080px (16:9 ratio) – same as banner image above).
- If you intend to use them as container-width banner (hero) you’ll resize them to 1200 x 720px (16:9 ratio).
- If you intend to use them within the content (and not banner) in landscape, upload them at 1200 x 900px (4:3 ratio). in portrait 900px x 1200.
- Your feature images need to be 1200 x 900px (same as content image above)
- Each image should be a very maximum of 150kb in size, except for the banners that may require to be heavier, up to max 275kb in size
Once you upload your images, WordPress will automatically resize them to 4 sizes (and keeps your full image size as uploaded) as defined in your wp-admin>settings>media. Your web developer may have changed the default sizes.
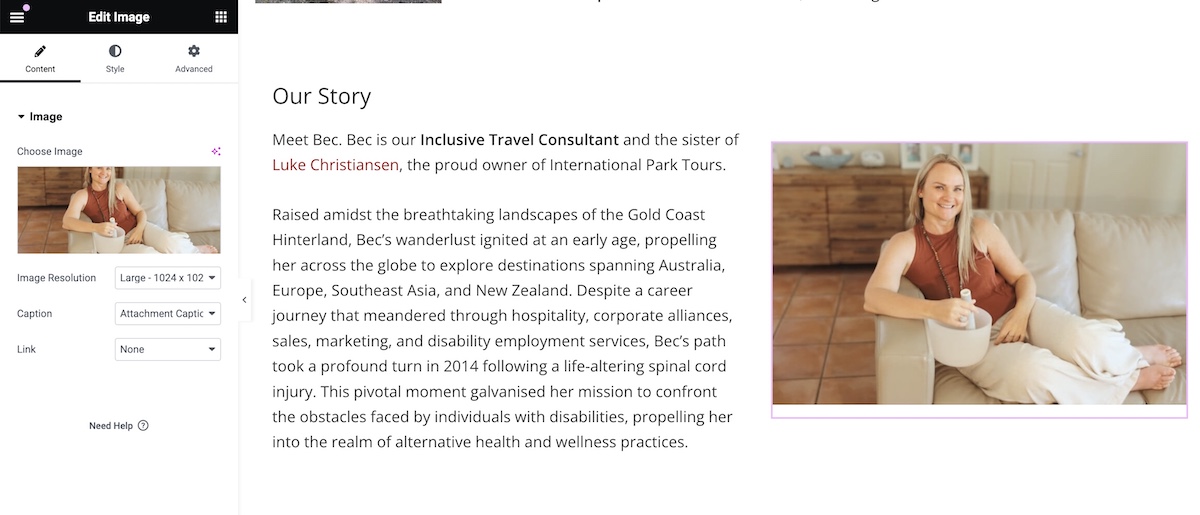
When you insert the image in your page, select from the best size depending on the location:
- Thumbnail: 150×150 px
- Medium: 300×300 px
- Medium-large: 768×768px max (not visible in the media settings)
- Large: 1024 x 1024 px max: feature images, gallery images, content images
- Full size as original: will be for the full-width or container-width hero
- There may be a few extra image sizes that appear from plugins or your theme.


